
Unfortunately, because of all the technology involved, speedboosters don’t come out cheap, and this is why I was curious to compare two competing products : the most common Metabones Speedbooster Ultra at 600 dollars and the Viltrox EF-M2 at 170 dollars. You can also find simple 20 dollar EF to Micro Four Thirds metal adapter rings, which is equivalent to not using a speedbooster at all . Note that Aputure and Metabones both sell a 400$ smart adapter which is basically an enhanced adapter ring with the electronic control of the lens but without any glass. So let’s see how they compare in the real world !
If you don’t know how a speedbooster works, I recommend you check out this article before reading : https://zebrazone.tv/what-is-a-speedbooster/
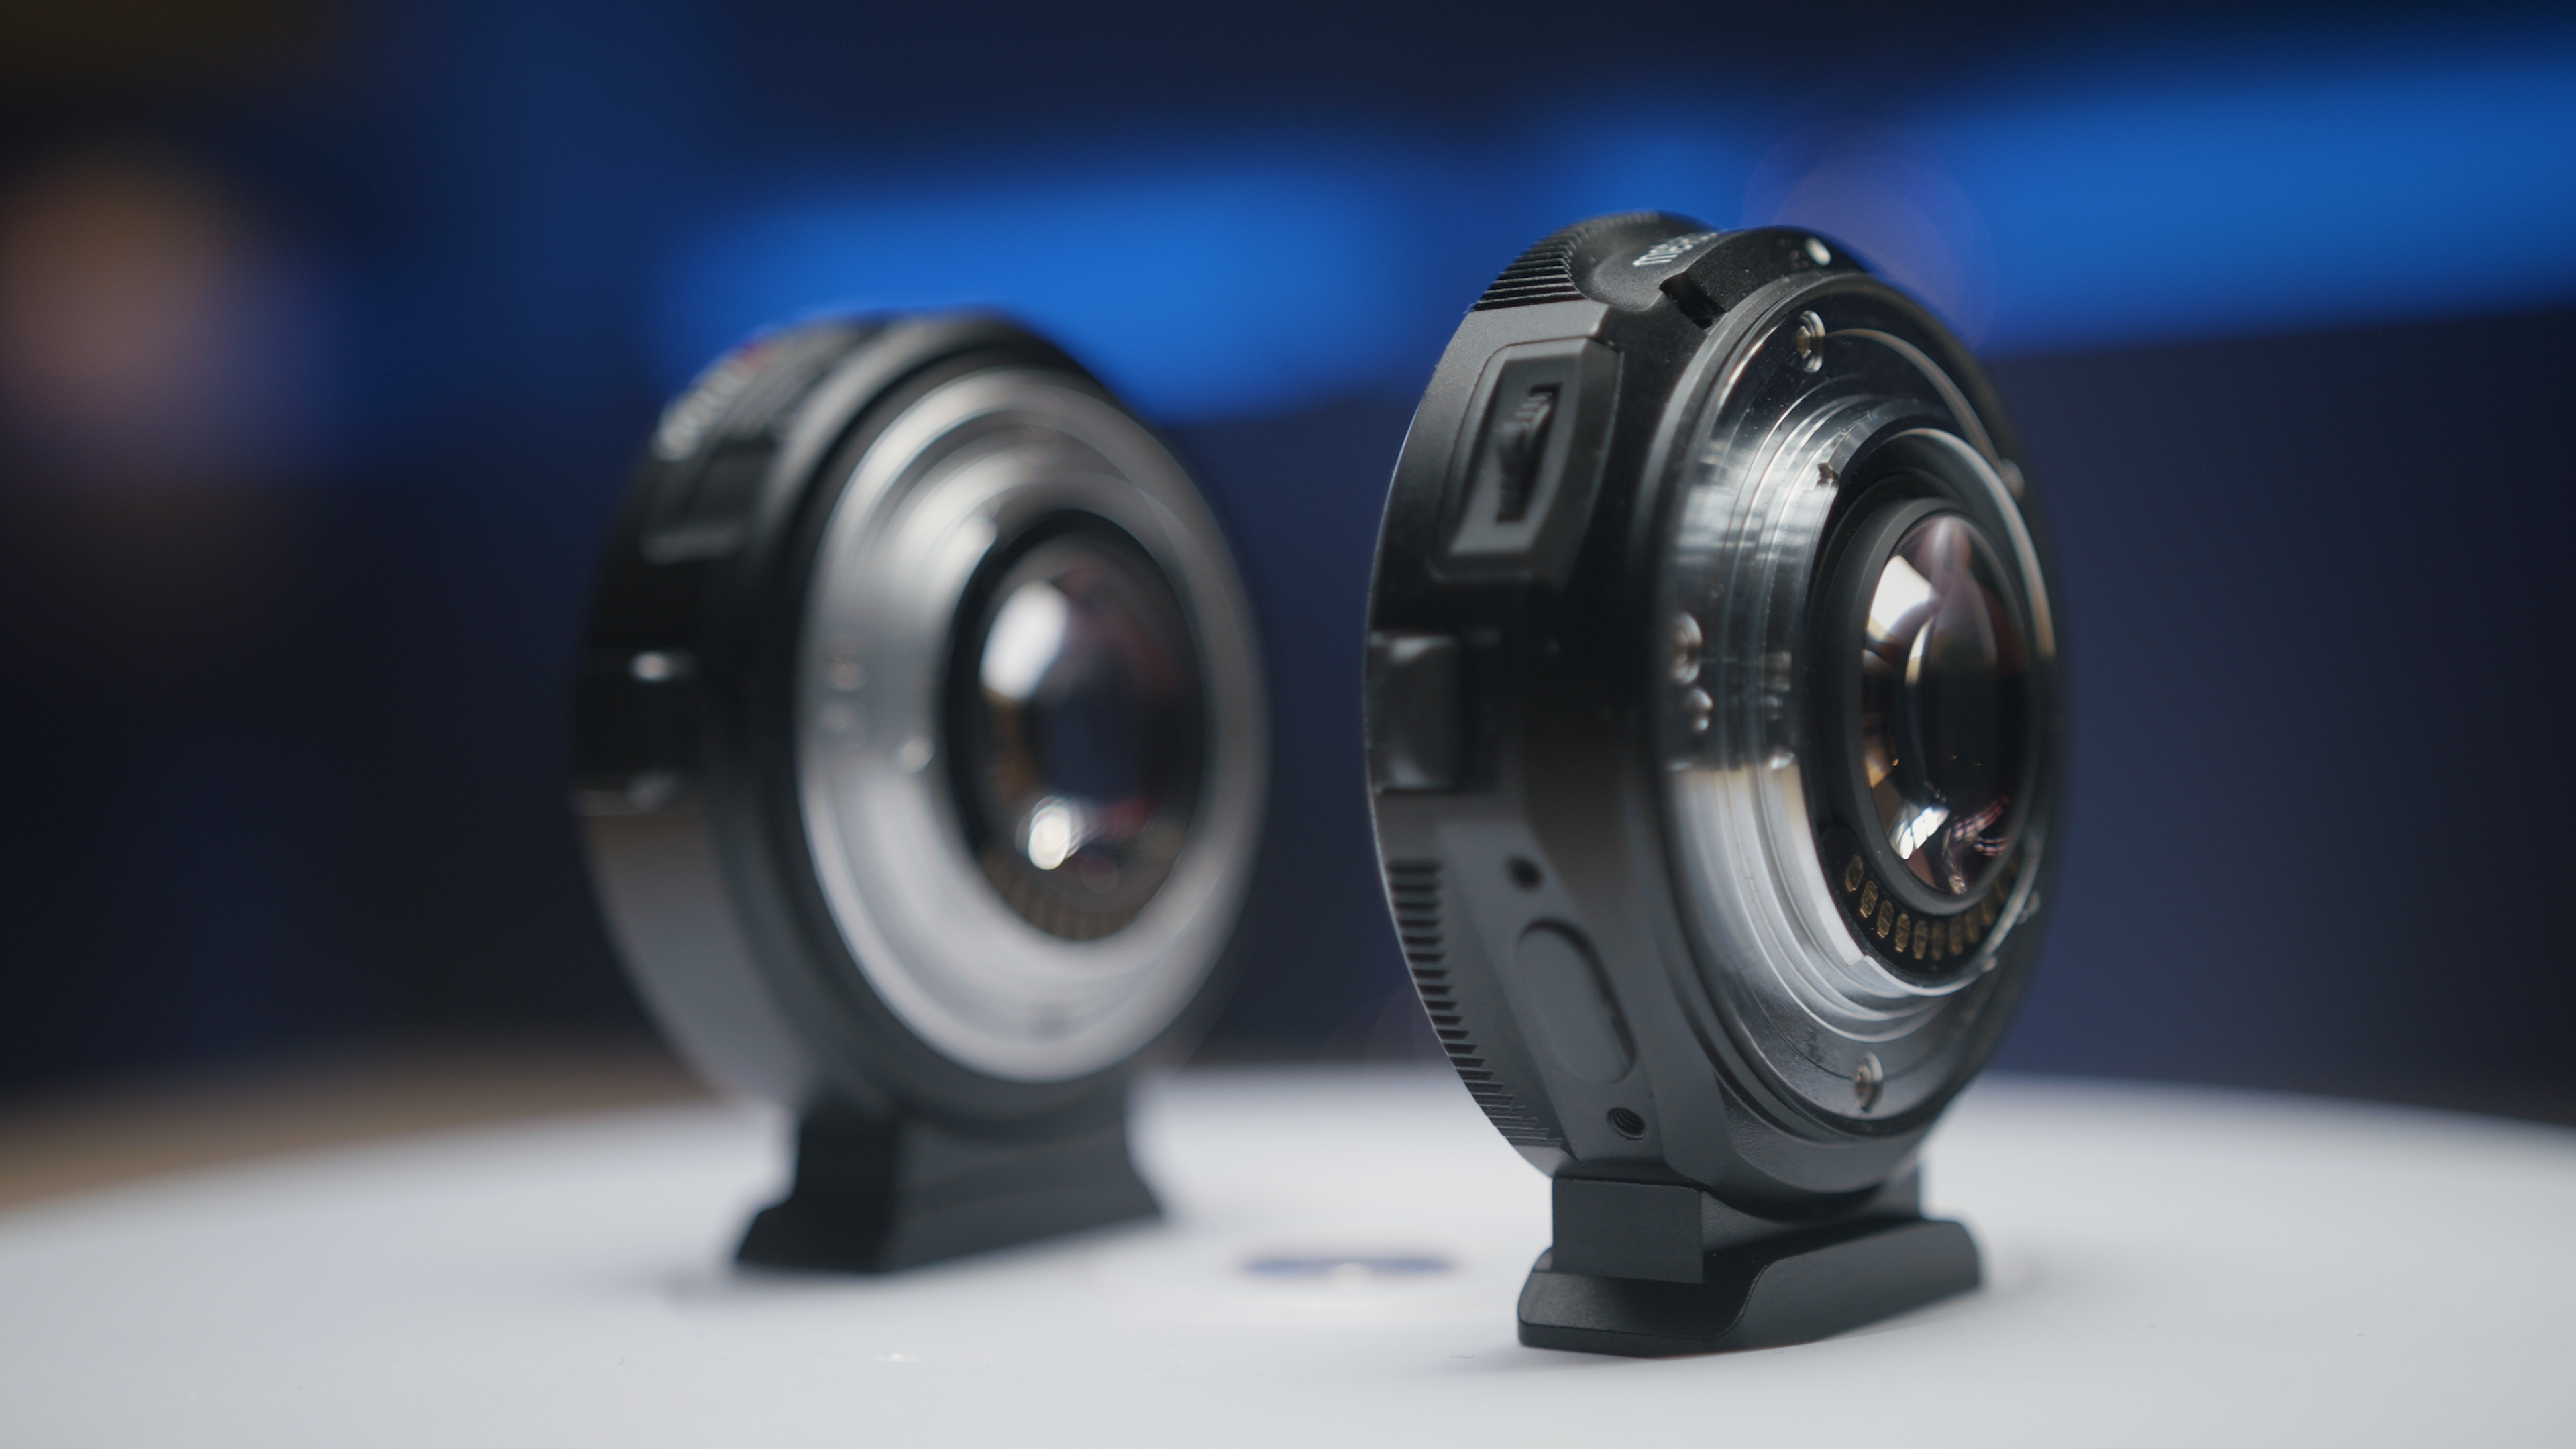
Comparing Metabones Ultra 0.71x vs Viltrox EF-M2
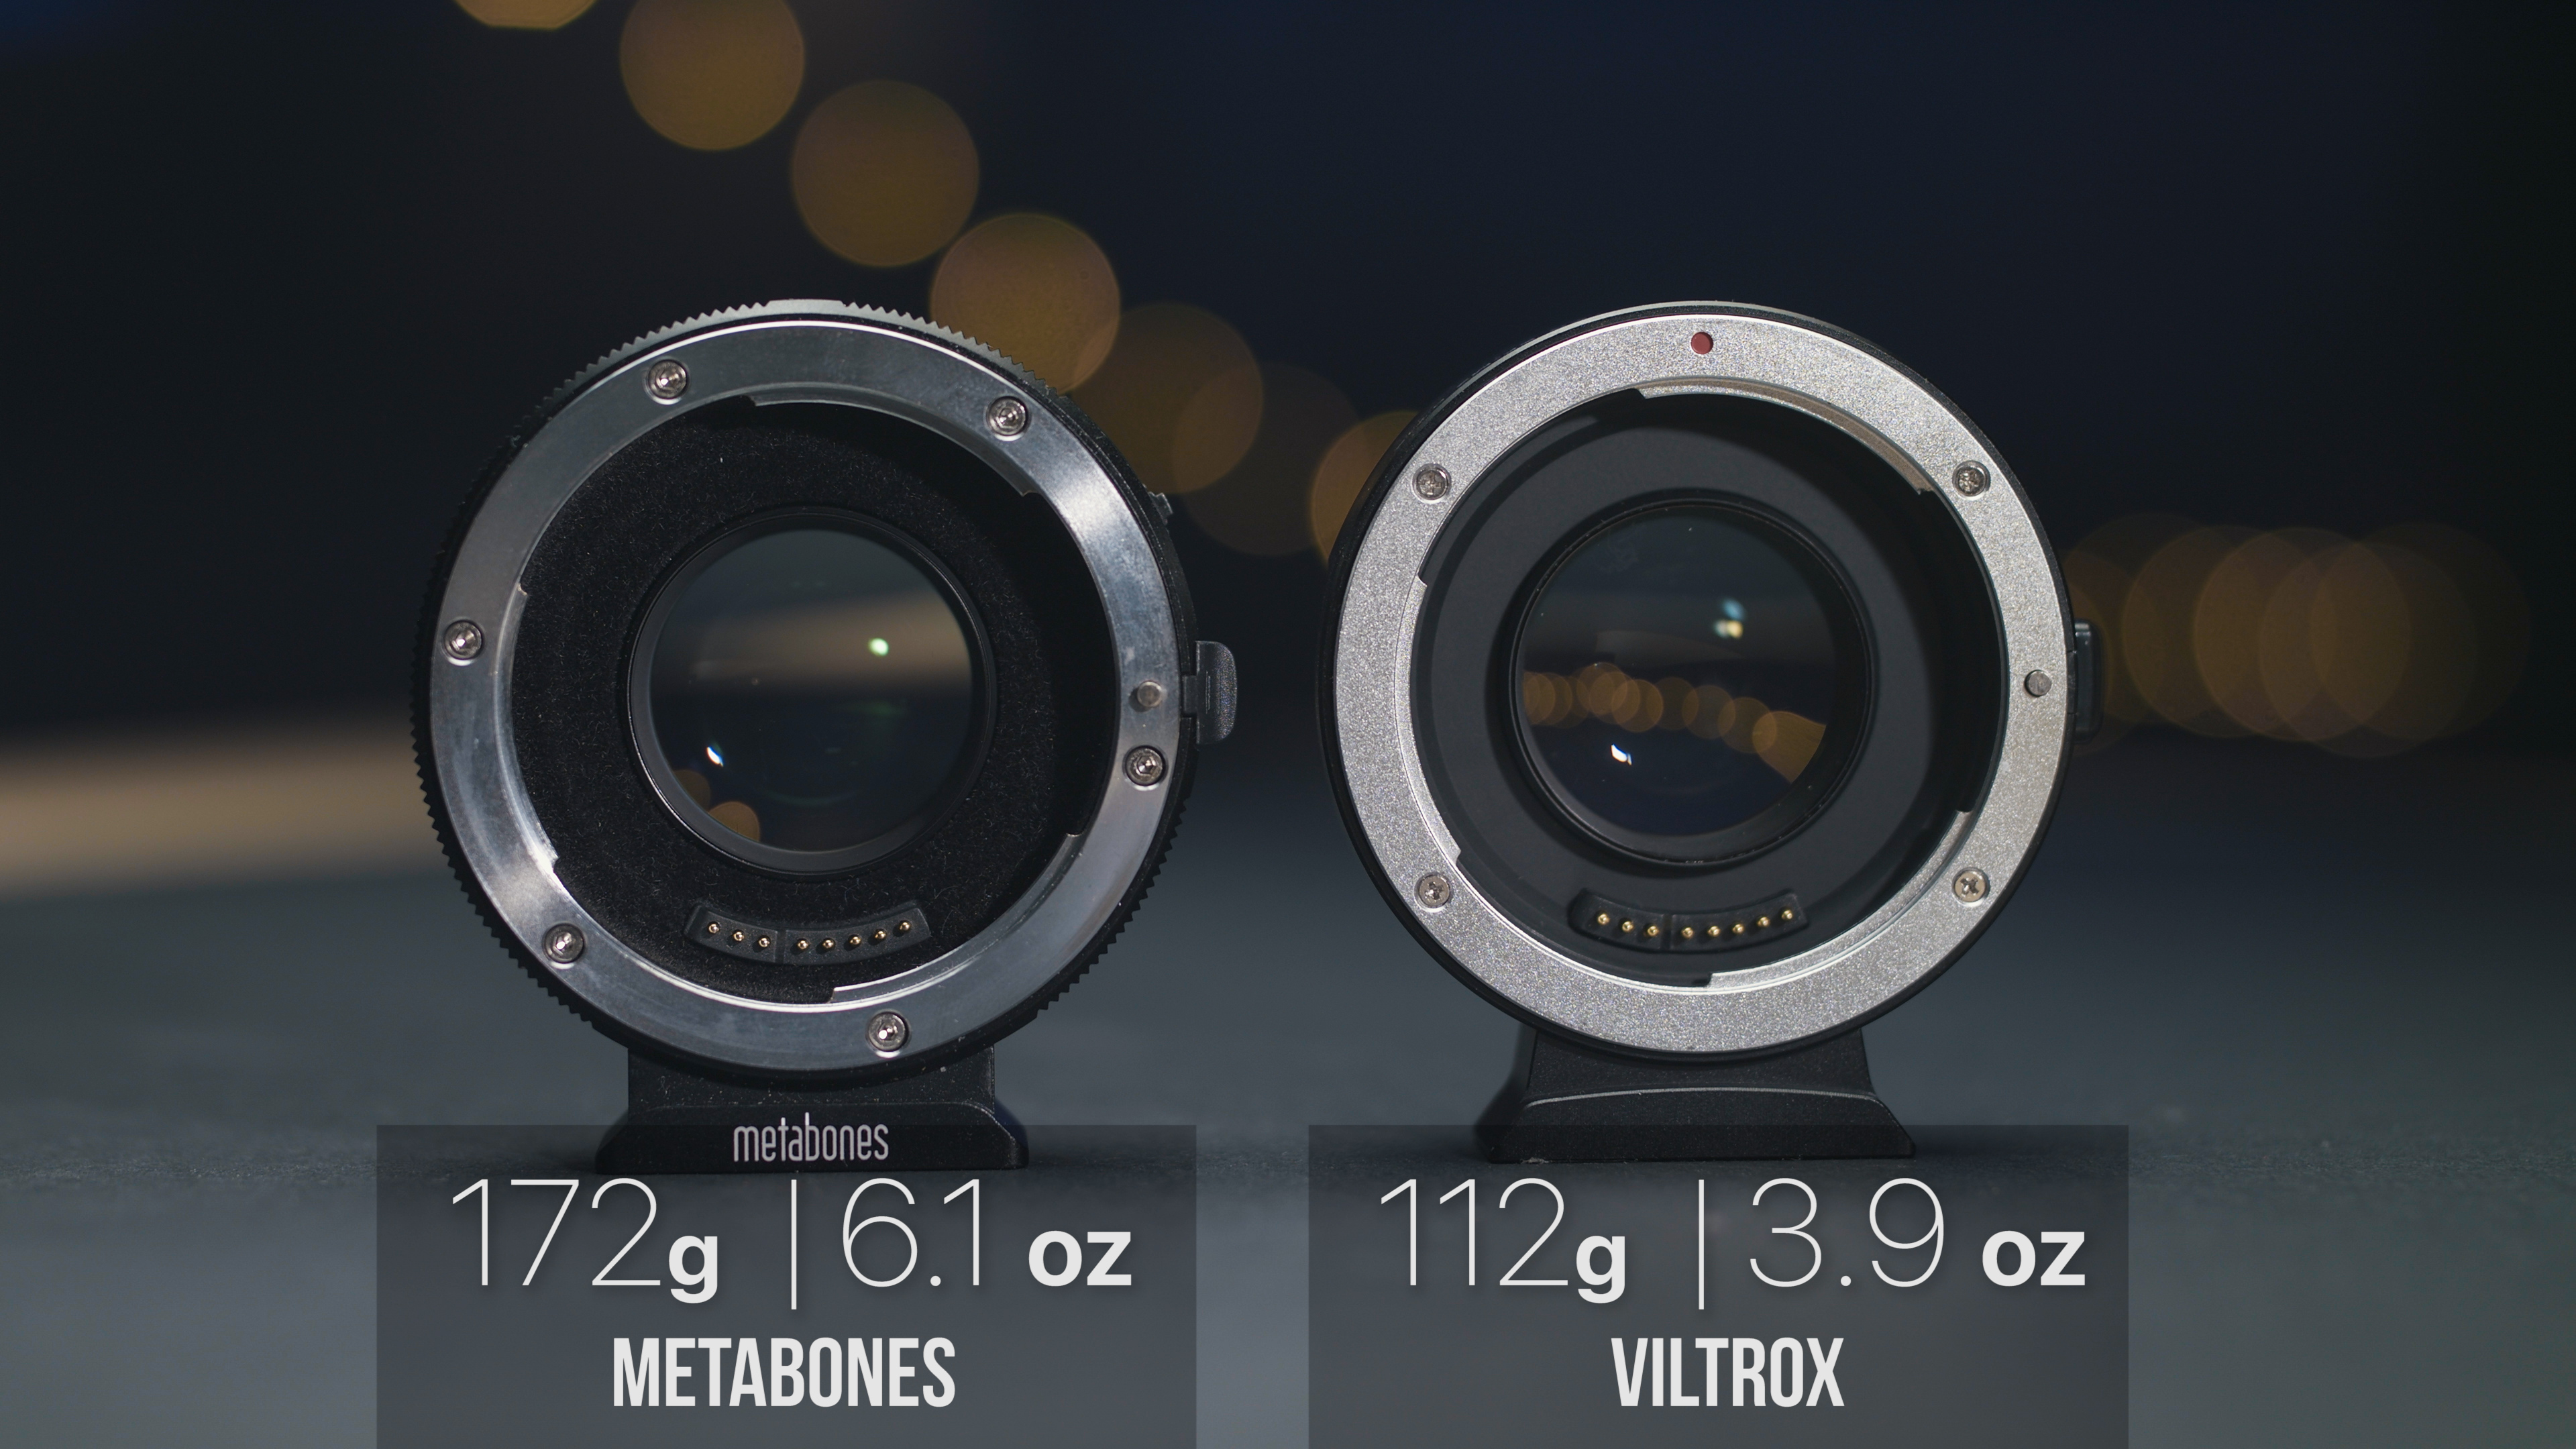
Looking at the outside, it’s obvious the Metabones speedbooster has the highest build quality, definitely looks rock solid compared to the Viltrox. It has these soft cushions which I believe are there to hold the lens firmly in place. There is much more play with the Viltrox than with the Metabones, the lens can move a little. So it’s pretty clear that the Viltrox is just a lower quality copycat of the Metabones. One advantage though is that the Viltrox EF-M2 is lighter than the Metabones Ultra .
Now let’s see how they compare in the field.
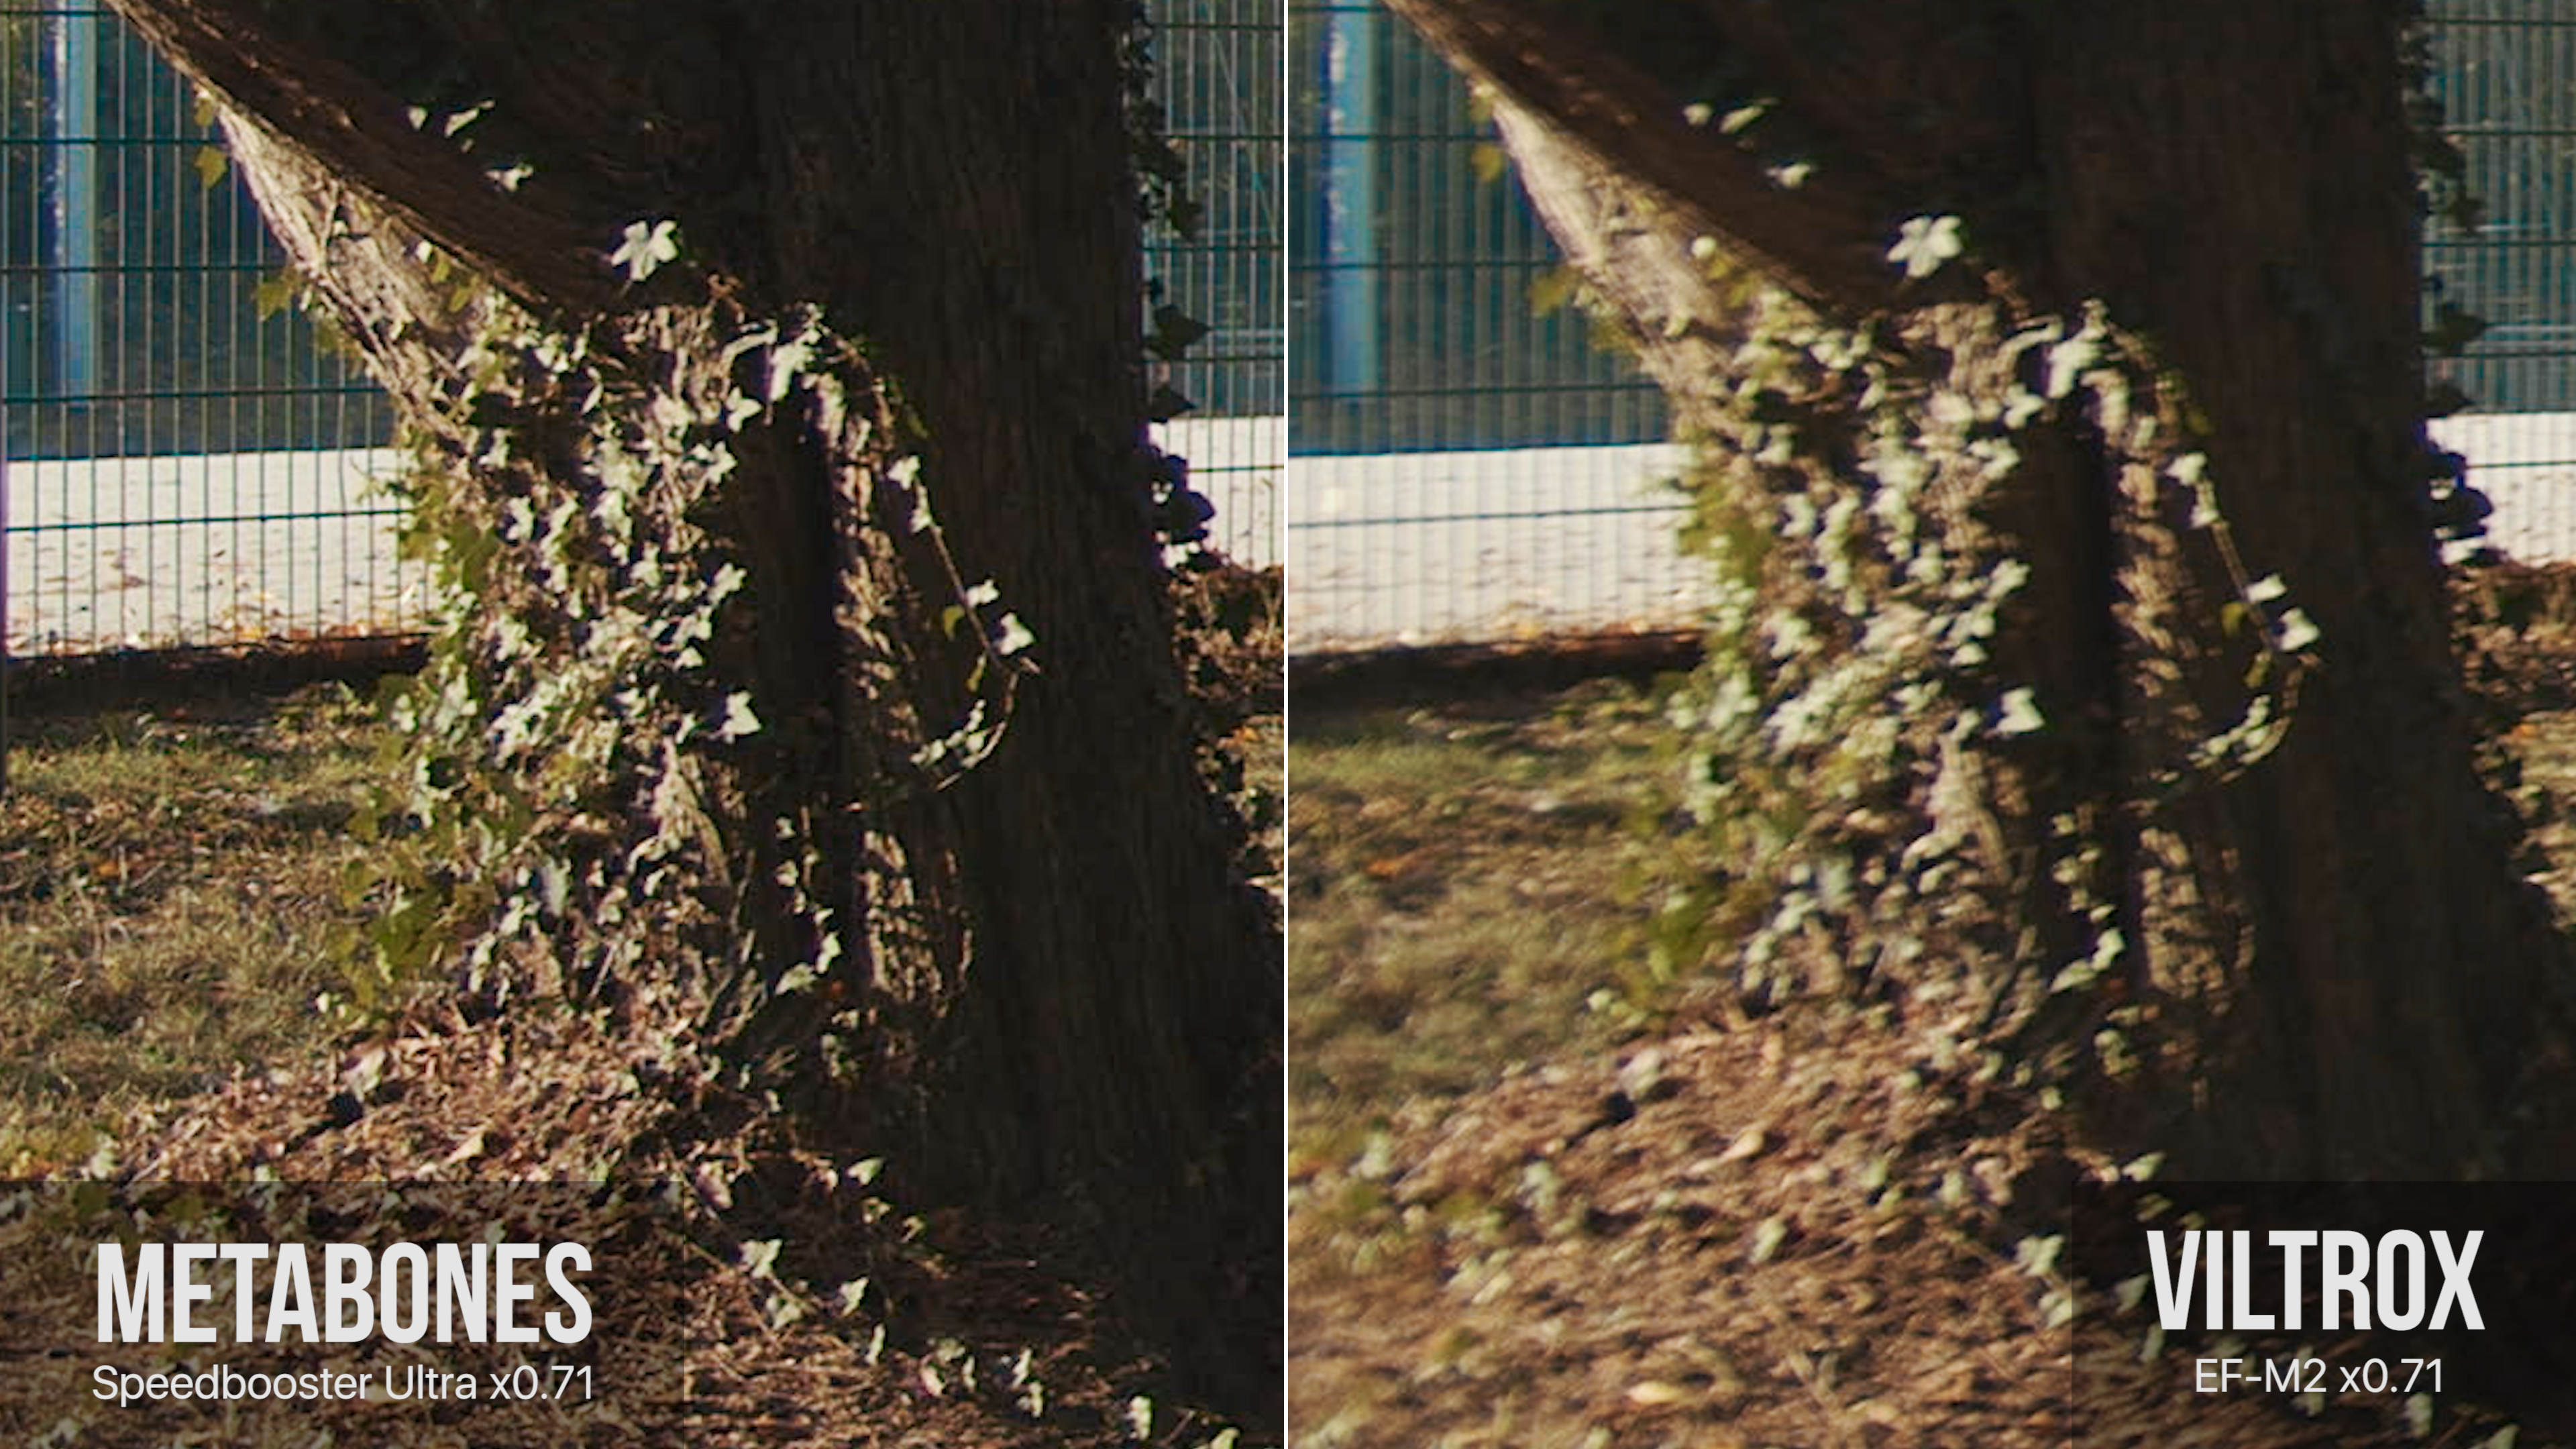
I shot several scenes with a blackmagic pocket 4K camera and a Sigma 18-35 lens and examined the footage full screen. My take is that the quality gap will be more or less important depending on the type of scene you’re shooting. On nature shots with high depth of field it really struck me, the Metabones produces a much much higher quality image than the Viltrox. Generally speaking, when looking at the center of the image, the two are often equivalent, with the Metabones being a tad sharper.
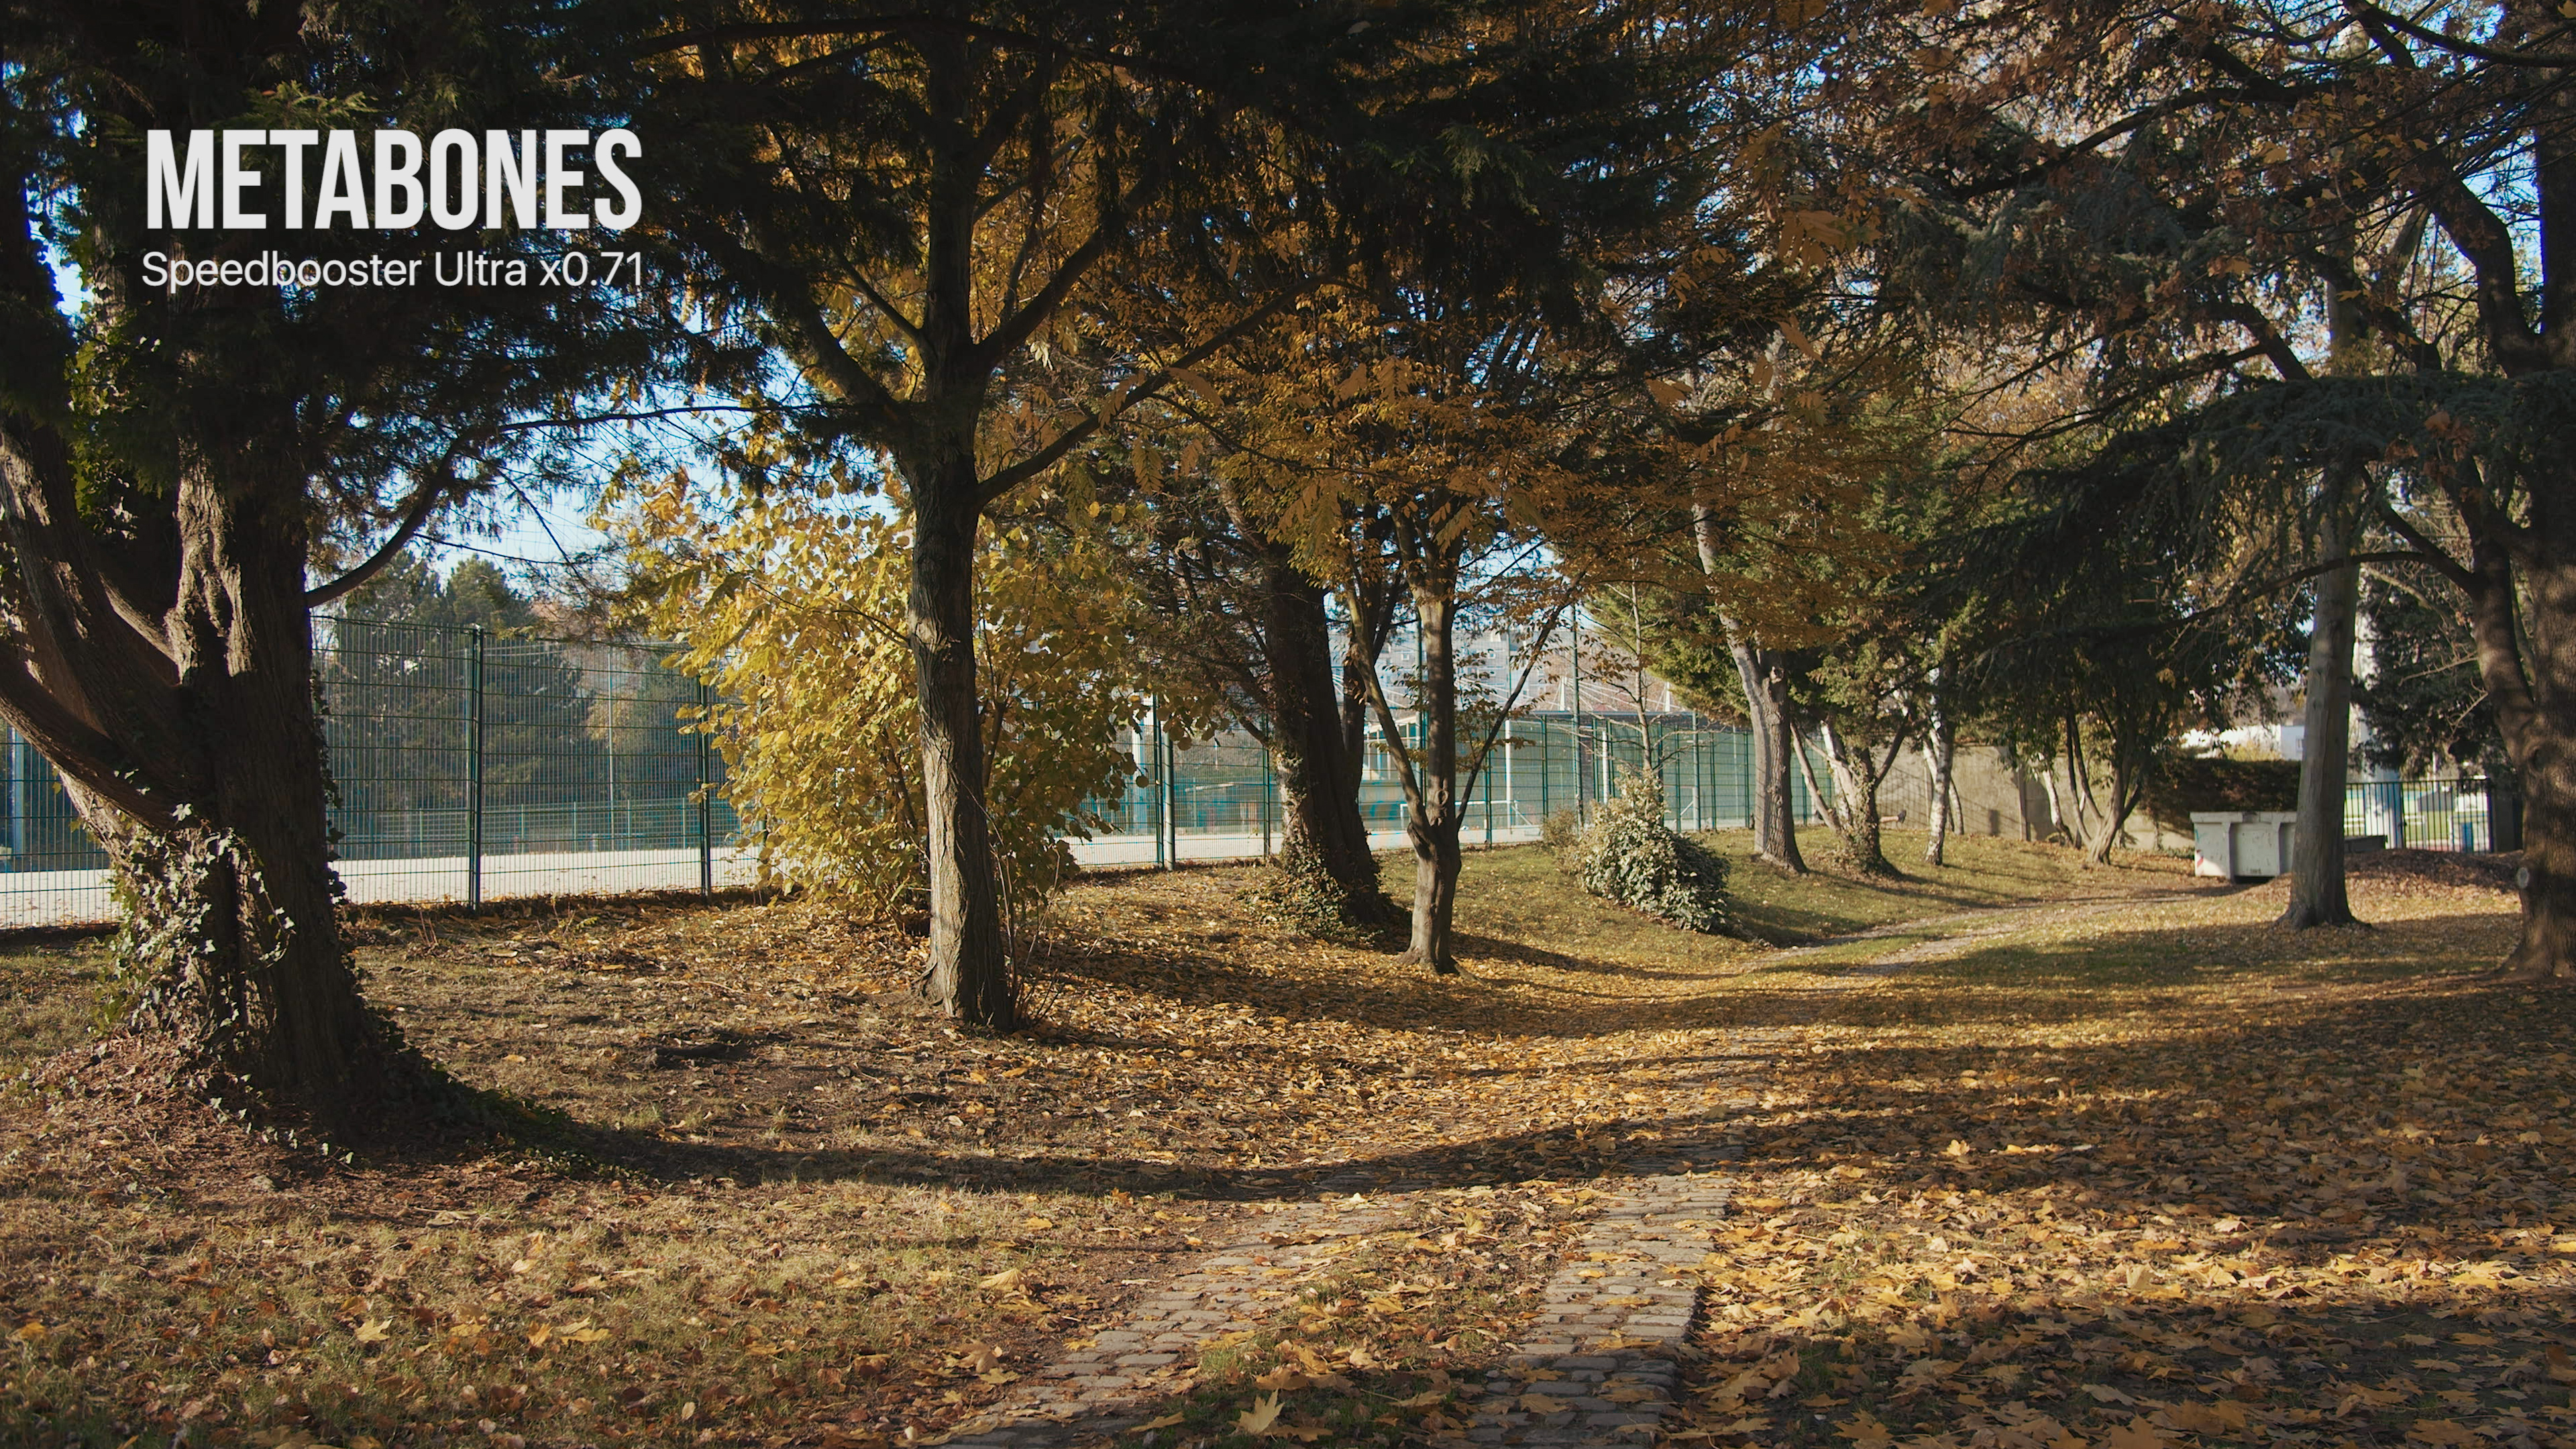
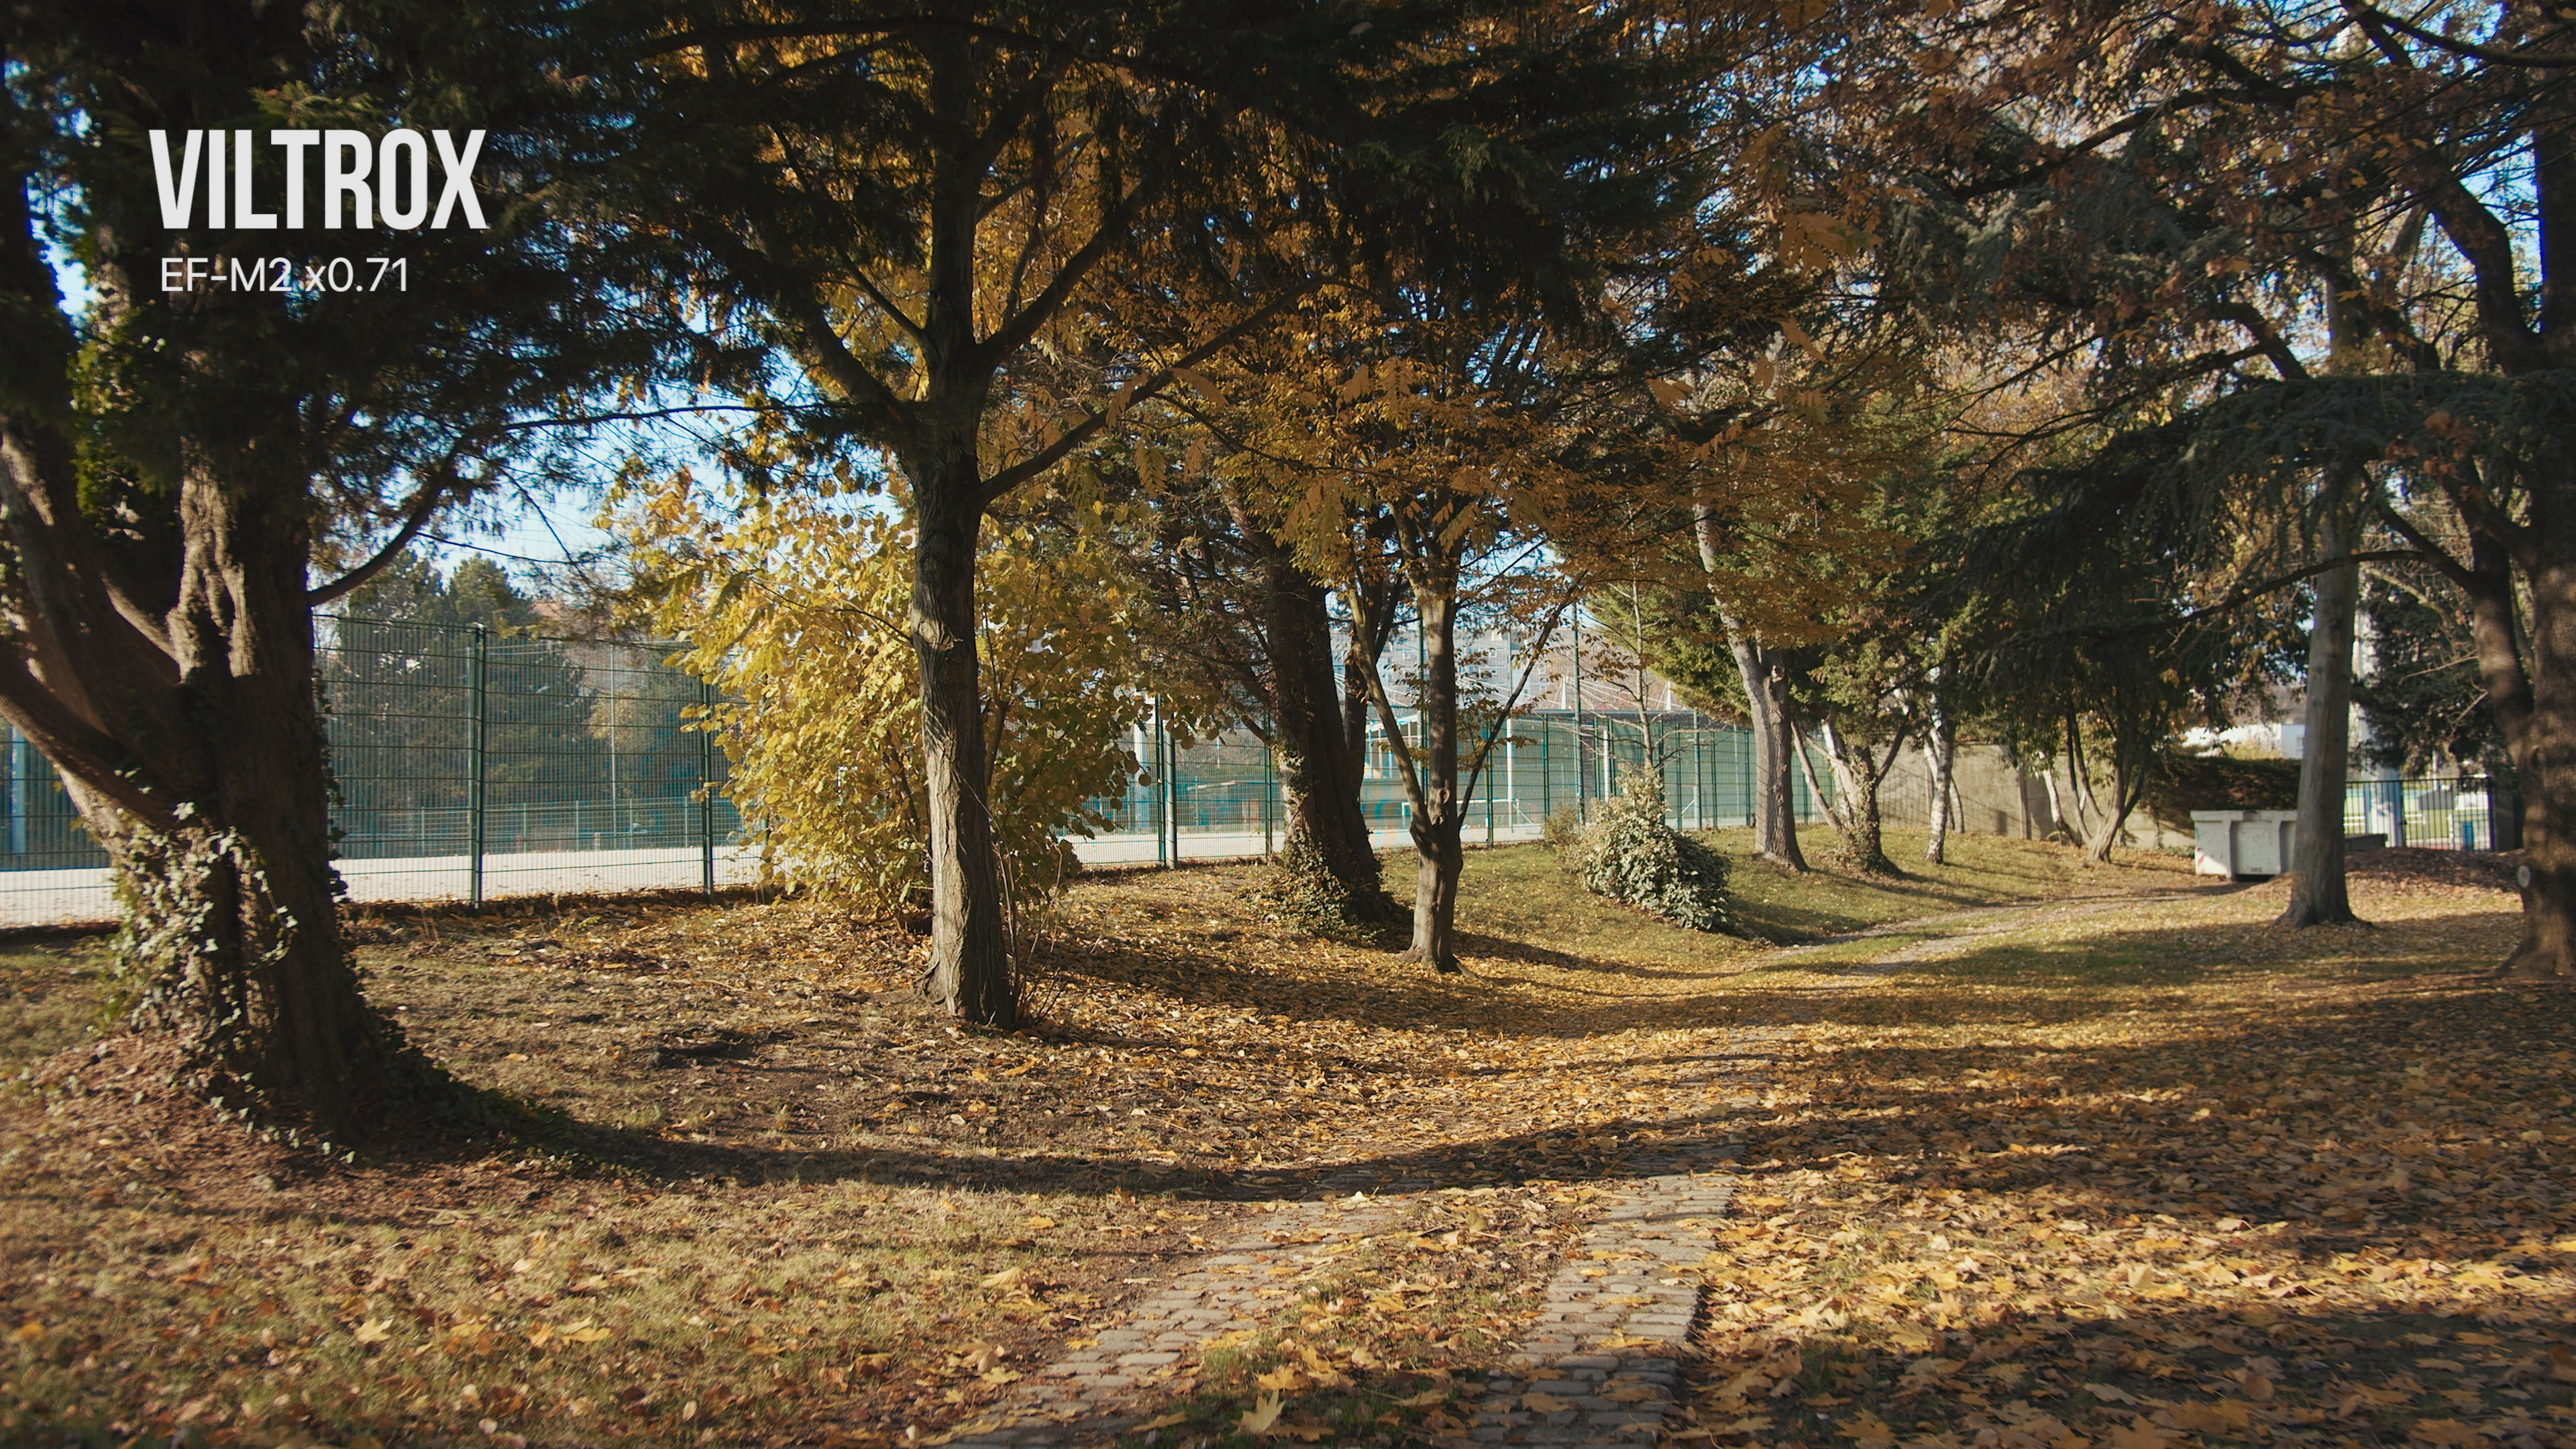
But when you head towards the sides of the image, the Viltrox looks blurry with nasty aberrations. These aberrations get worser on objects on the sides that are close to the camera.
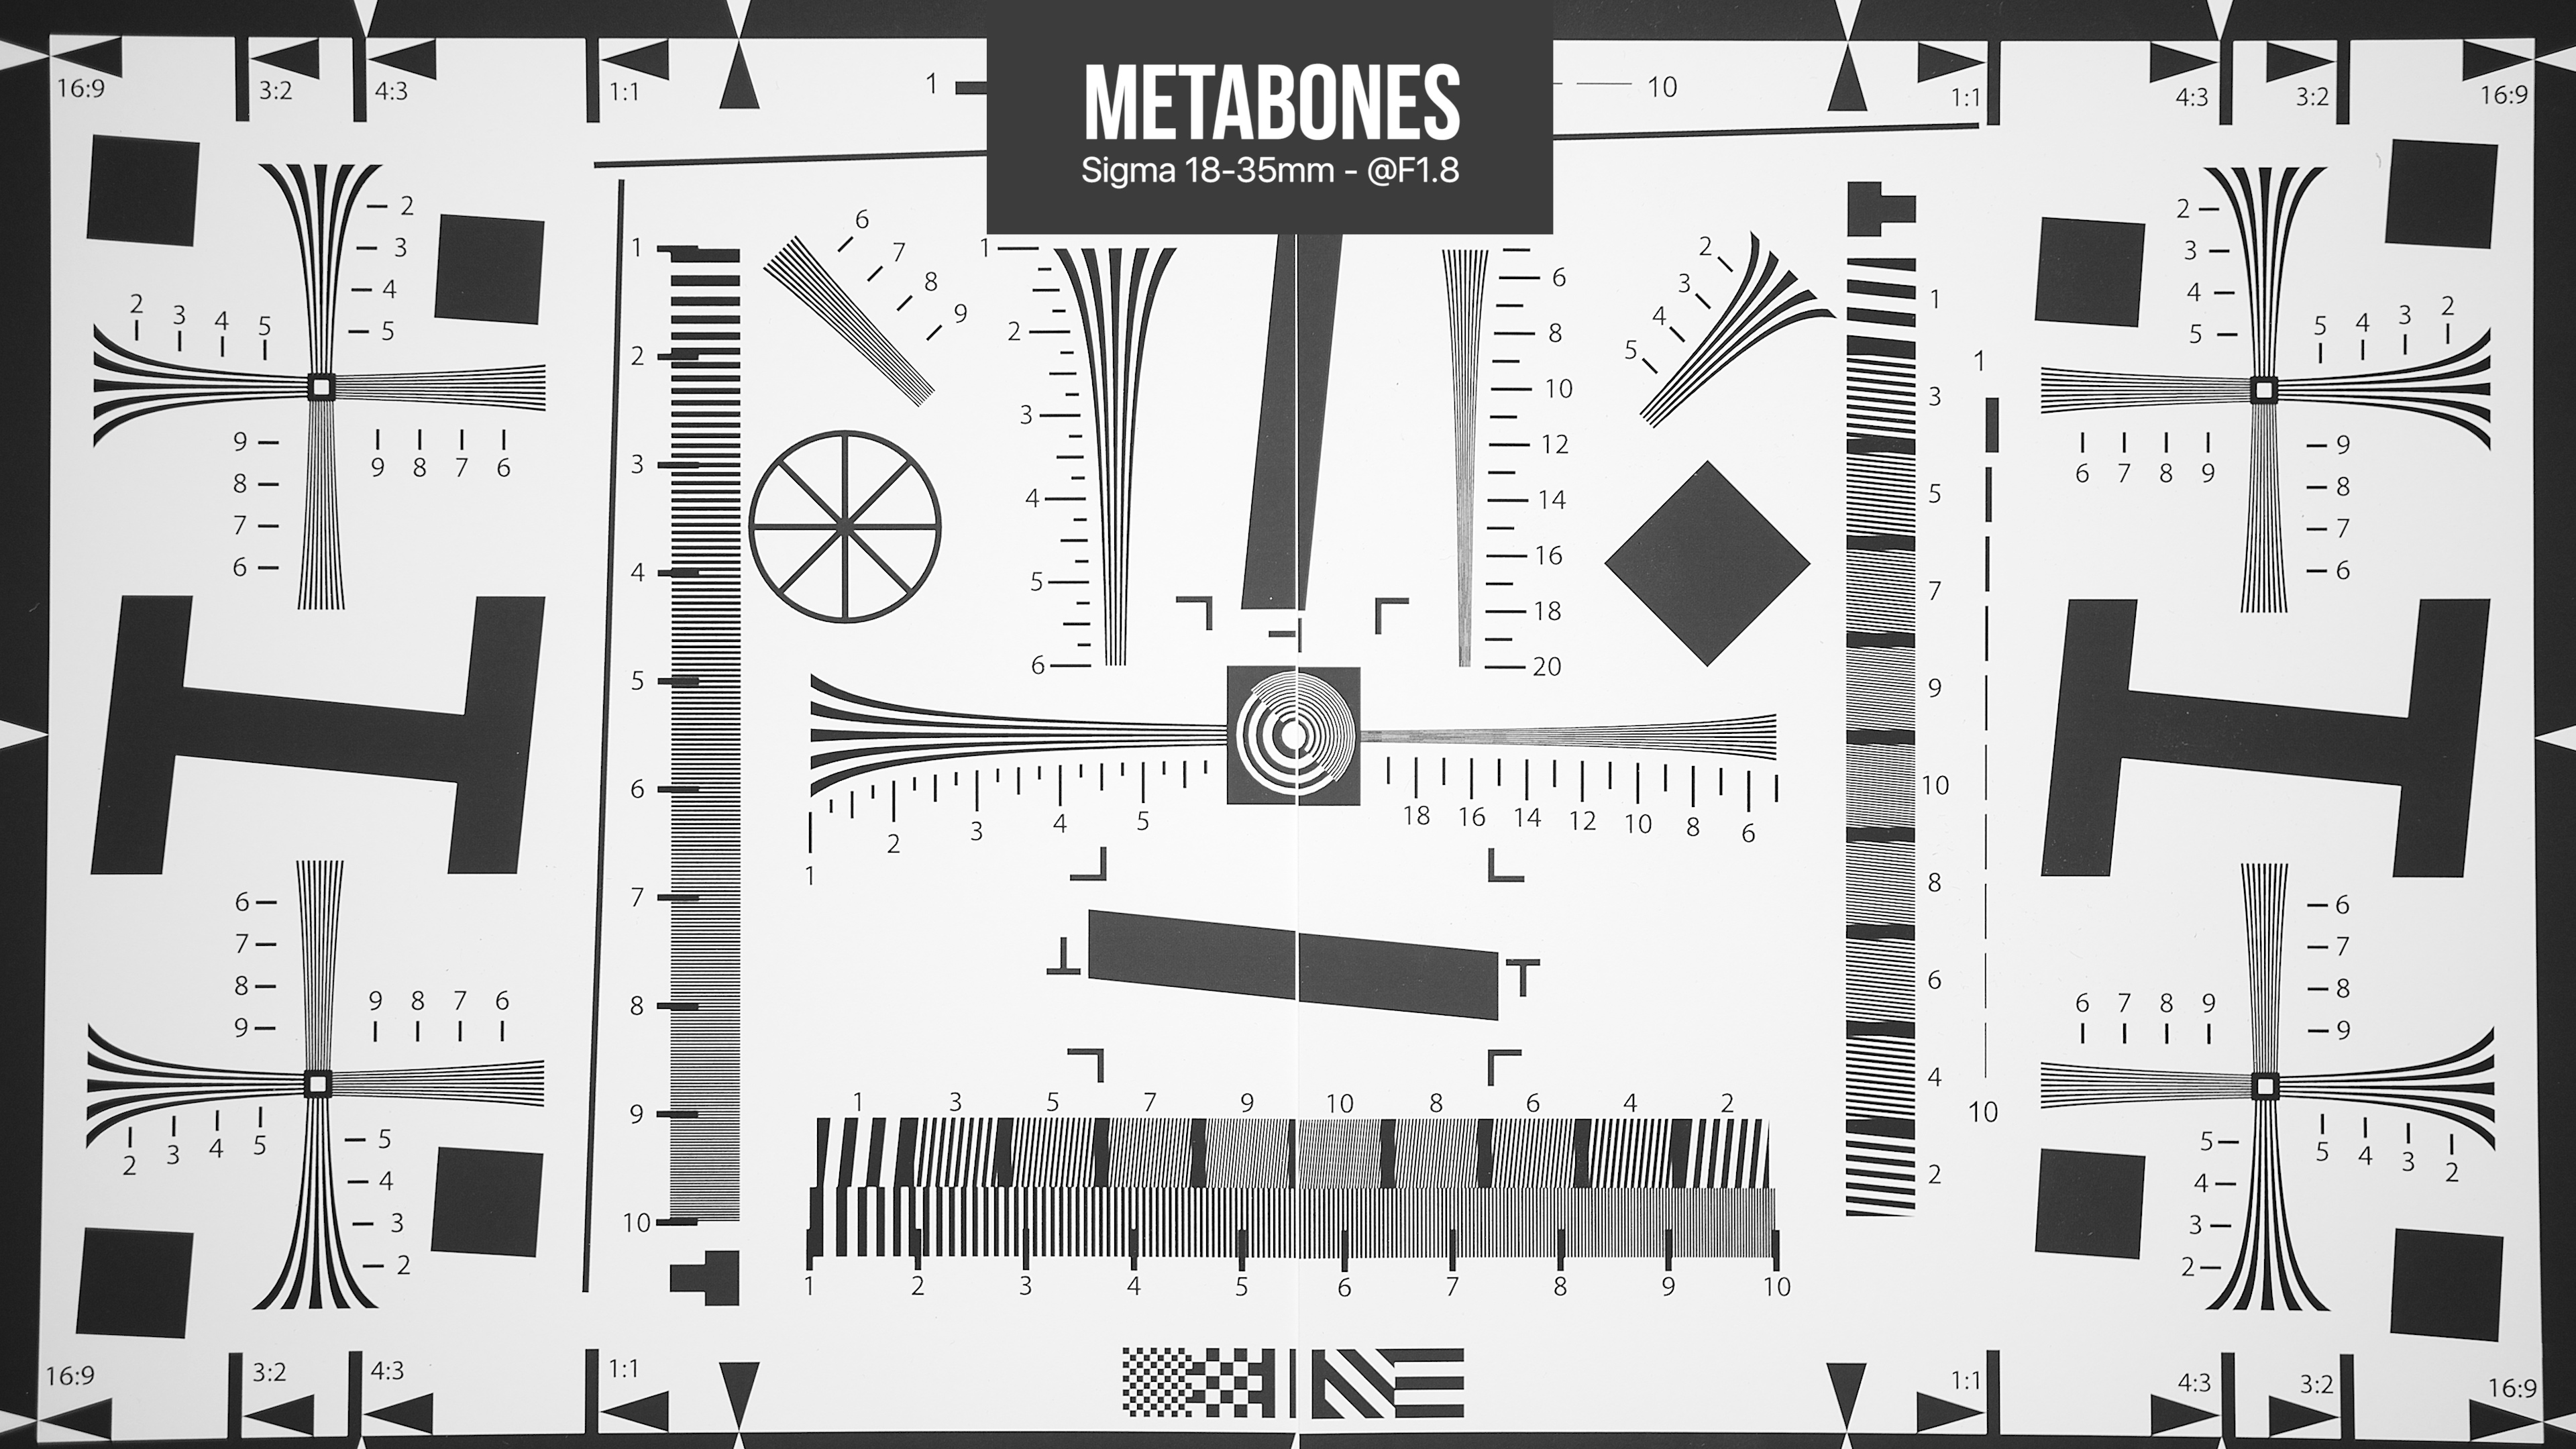
Here you can see how all this translates when shooting a standard calibration chart.


However, when shooting an isolated subject with low depth of field and blurry backgrounds, you tend to forget which footage is shot with which since the sides are blurred anyways. So in that very situation the two speedboosters produce a very close end result.


With this Pocket 4K and Sigma 18-35 combo I did not find any vignetting using either of the speedboosters. Please note that you will get vignetting if you pick the wrong speedbooster, so make you read :
Here you can download the raw files :
So, to finish with, you’re definitely getting what you pay for. I had read forums saying the Viltrox and Metabones were almost equivalent but … I don’t thinks so.. unless my unit has quality control issues, I think there is an important gap between the two . If you’re on a budget, I’d recommend going for a smart adapter with no glass instead, although the Viltrox would be an interesting option on some shots where it will be close to the Metabones. I’ve done my best to show you different scenes but if you’ve had a different experience or additional remarks, feel free to share in the comments !
If you don’t know how a speedbooster works, I recommend you check out this article : https://zebrazone.tv/what-is-a-speedbooster/
If you need help choosing your magnification factor, check out this article ! https://zebrazone.tv/speedbooster-ultra-vs-xl-how-to-choose-the-correct-magnification/


About The Author: Thibaud
Founder of the Zebra Zone blog & Youtube Channel
More posts by Thibaud